Weaving in Marrakesh
I’ve been traveling a lot lately, and I’ve challenged myself to take some sort of fibre or textile class wherever I can. Last week, I was lucky to learn how to weave a traditional Berber...

If you’re having trouble stitching the Tree Lot sign, here’s a how-to video with 3 (!!) different methods you can use to add in details and lettering onto your needlepoint stocking.
Follow the pattern on your canvas. Though it may look a little crazy up close while you stitch, remember that you’ll be looking at this stocking 8 feet away (on your mantle). The impression of the letters will look better from farther away. Don’t stress too much about the details.
I recommend stitching the letters first and then filling in the background of the sign.
Go ahead and stitch the entire sign brown. Then, using a single strand of wool, pull your needle through and embroider small letters over the top of your brown sign stitches. You may want to look at the reference image of the stocking to gauge the spacing of each letter.
This is kind of like painting with your needle. Don’t worry if it’s not perfect! The sign is supposed to look hand-drawn.
Print this chart! You want to have a physical copy of your chart to mark up. Trust me.
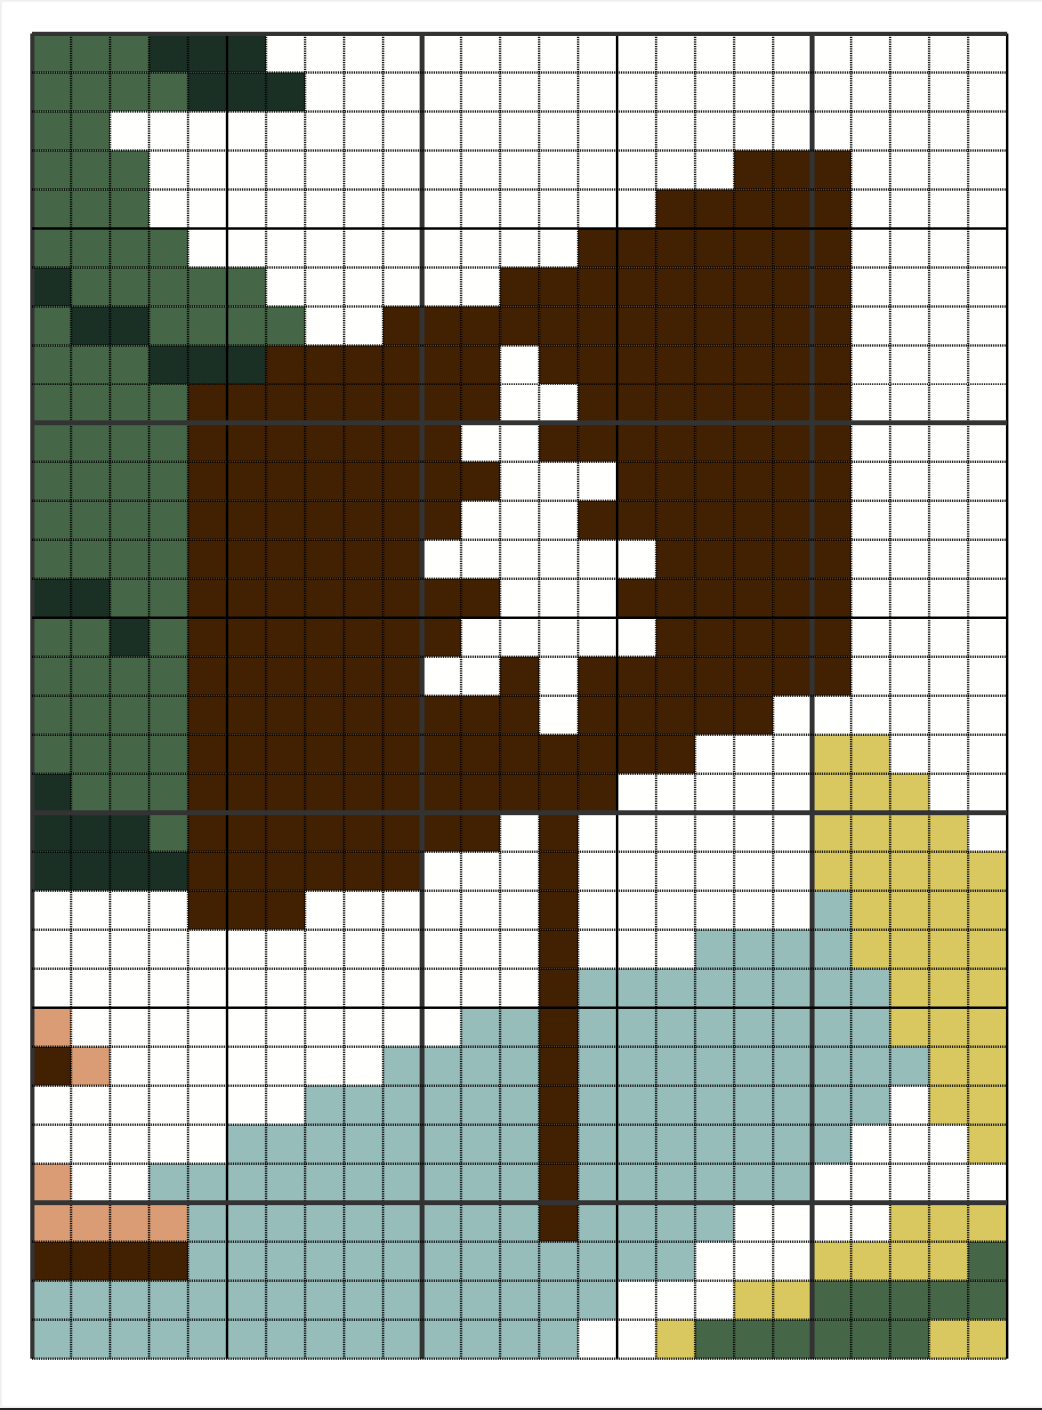
Charted needlepoint requires counting intersections on your canvas instead of following a painted design. You are transferring the design from the chart to the canvas as you stitch.
Get comfortable with the grid. An easy way to get the hang of counting your chart/canvas, is to always think of the squares as intersections on your needlepoint canvas, instead of the actual holes of the canvas. This is really important so you don't get confused when counting your design.
For more general needlepoint chart tips, find a full how-to video on the Spider Spun YouTube.